Let’s create our ERC20 Token using Solidity, for that we need to create our work environment first, let’s install Truffle and Ganache.
This article is available in Portuguese in 2 Parts:
Instalando ambiente: https://www.youtube.com/watch?v=RxufCpZHwB8
Criando token ERC20: https://www.youtube.com/watch?v=ws8QNfJE114
Installing Truffle
Before installing Truffle, you will need to install Node.js, click here to access the node website and download it (no secret, installations is standard).
To see the complete documentation of Truffle you can accesss the link here
Open your terminal console and the following command below:
npm install -g truffle
And that’s it for now.
Installing Ganache
To install Ganache, you will need to access this link, and download, the installation also has no secret, install, after finishing we will do the basic configuration.
Open Ganache, and click in New Wokspace
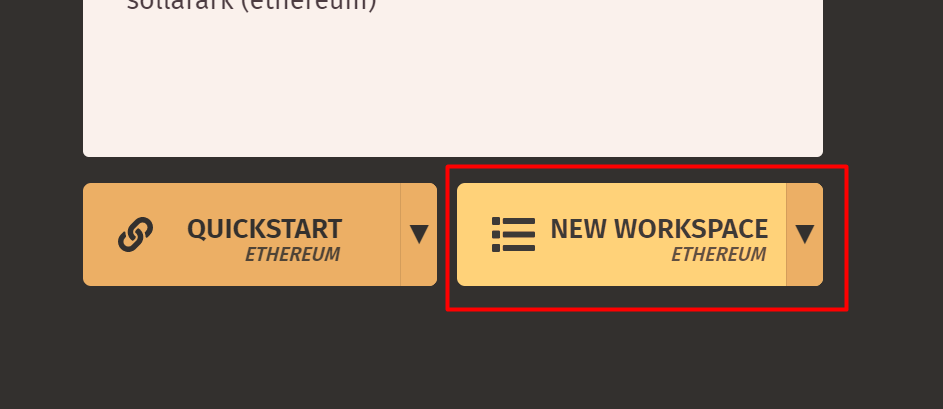
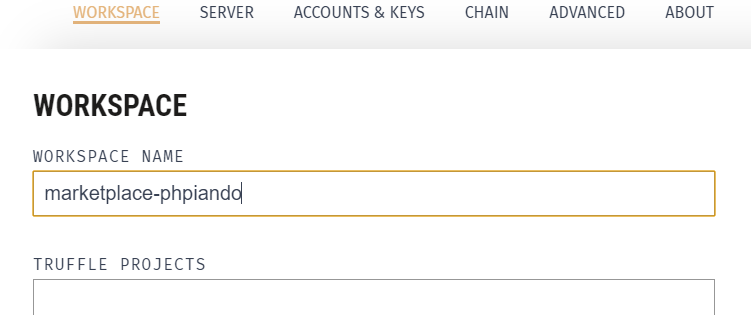
On the next screen you can change the name of your project, put the name your prefer, in my case I will name it “marketplace-phpiando”.
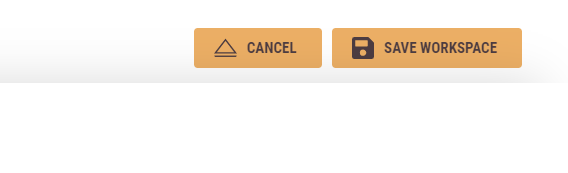
Click on the tab “Server”, and change the port 7545.
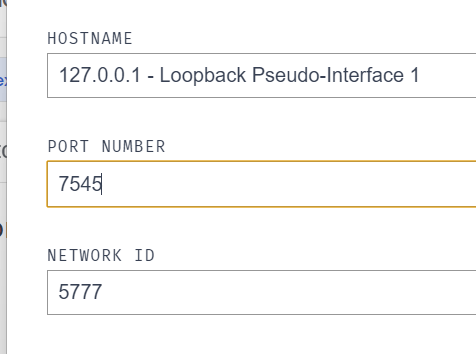
For now the only configuration we will do is this, for our purpose we don’t need much. Click the “Save workspace” button.
Now click on the name of your project that appeared in the list, and you should have a screen with something similar to the one below:
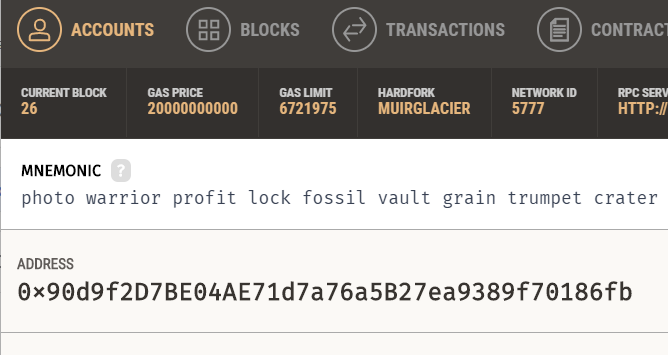
Ganache done! Let’s start programming now.
Creating project in Truffle
Open your terminal console and navigate to any directory you want to start your project, in my case, my directory is C:\Projects and type the commands bellow.
mkdir marketplace-phpiando
cd marketplace-phpiando
truffle init
With the commands typed above, you should have a folder with 4 files like the image below:
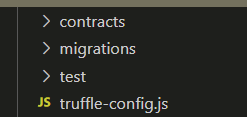
If you look at truffle it starts with a Solidity example file, at this point just ignore it.
Open the file “truffle-config.js” and uncomment the lines below.
....

development: {
     host: "127.0.0.1",     // Localhost (default: none)
     port: 7545,            // Standard Ethereum port (default: none)
     network_id: "*",       // Any network (default: none)
    },
.....
What is OpenZeppelin
Just opening a small parenthesis, we will use OpenZeppelin, it is a library that today has models of smart contracts that helps us and guarantees that we will have security in the development of our contracts.
OpenZeppelin is open-source and is used by many developers, because every day it evolves in terms of security and best practices.
You can read more about OpenZeppelin on their website.
Installing OpenZeppelin
Still in the same directory, type the command below to install node in this folder, we will need a lib to help us in the development of your contracts.
npm init
Let’s install the lib OpenZeppelin
npm install @openzeppelin/contracts
Okay, we’re done with our preparations.
Creating our ERC20 token
Let’s now type the following command to create the contract for our ERC20 token, in my example the name of my token will be “PHPiandoToken”, but you can use whatever name you prefer.
truffle create contract PHPiandoToken
If you look now inside our “contracts” folder, you will have a new file, if you open this file at that moment, we will have a structure similar to the one below.
// SPDX-License-Identifier: MIT
pragma solidity >=0.4.22 <0.9.0;

contract PHPiandoToken {
  constructor() public {
  }
}
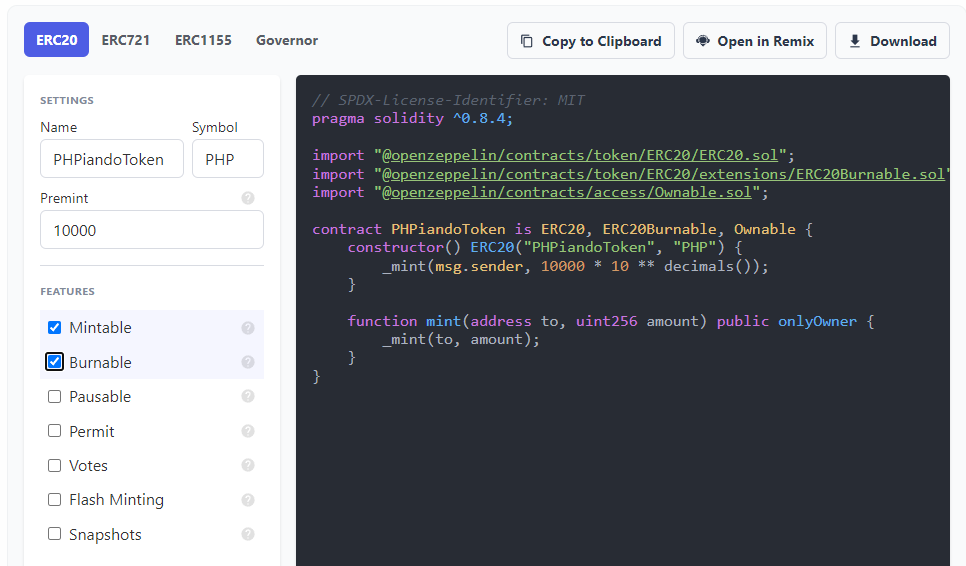
As I said in my previous article Difference between cryptocurrencies and ERC20 Token, ERC20 is a standard model of what a smart contract needs to have to be considered a token, as I said OpenZeppelin helps us with that, that said, we can use today a “Generator ” of ERC20 Token, if you access this link we will have the page below.

As the purpose of this article is to demonstrate a simple ERC20 Token model, this contract generator is extremely useful, and of course, we have complete freedom to later add new methods that will help us, for now we will do the basics, let’s fill in the data based on in the name of our contract that we created in some previous steps, in my example I used PHPiandoToken.
Let’s get to the explanations.
When we create a token we need to have a name and a symbol, in this example I am using the name PHPiandoToken and the symbol is PHP.
The Premint option means that when you deploy this contract on the blockchain, 10,000 tokens will automatically be mined and these tokens will be transferred to the user “msg.sender”.
The Mintable and Burnable features are contracts that allow us to “mining” more coins in the future and also allow us to “burn” our currency.
Now let’s go to the explanations of the contract
import "@openzeppelin/contracts/token/ERC20/ERC20.sol";
import "@openzeppelin/contracts/token/ERC20/extensions/ERC20Burnable.sol";
import "@openzeppelin/contracts/access/Ownable.sol";
When we want to import contracts we use the tag “import”, if you notice we are importing 3 contracts from the OpenZeppelin library.
contract PHPiandoToken is ERC20, ERC20Burnable, Ownable
When we want to extend other contracts, we use the word “is” together with the contracts. We can extend multiple contracts.
constructor() ERC20("PHPiandoToken", "PHP")
If you notice, our “constructor” method has the word ERC20 beside it, in other words, we are using the ERC20 contract constructor, if you open the OpenZeppelin ERC20 file you will notice that we need to pass 2 parameters, Name and Symbol.
_mint(msg.sender, 10000 * 10 ** decimals());
Inside our constructor, we have the private method “_mint” (method that is in the ERC20.sol file), it expects 2 parameters, being the address that will receive the mined tokens and the amount.
As for quantity, we work with 18 decimal places, so don’t be alarmed by the conversion that is taking place.
msg.sender
A small explanation of what msg.sender is, when we are executing some method or doing some interaction in our contract, there will always be a value of msg.sender, in other words it is the wallet (person) that interacts with this contract, in our example when we run this in Truffle, the wallet that will be used will be the first one that is in the ganache, if you go back to the part where we installed the ganache you will notice that there are 10 wallet addresses, by default the first one will always be used to compile.
Let’s compile our contract.
Compile our contract
Copy the content that the openzeppelin generator made and paste the content into the file we created in Truffle.
// SPDX-License-Identifier: MIT
pragma solidity ^0.8.4;

import "@openzeppelin/contracts/token/ERC20/ERC20.sol";
import "@openzeppelin/contracts/token/ERC20/extensions/ERC20Burnable.sol";
import "@openzeppelin/contracts/access/Ownable.sol";

contract PHPiandoToken is ERC20, ERC20Burnable, Ownable {
    constructor() ERC20("PHPiandoToken", "PHP") {
        _mint(msg.sender, 10000 * 10 ** decimals());
    }

    function mint(address to, uint256 amount) public onlyOwner {
        _mint(to, amount);
    }
}
Let’s create a file to deploy our smart contract on our localhost blockchain (ganache). I’m going to use the same name as our contract to maintain a standard.
truffle create migration PHPiandoToken
A new file was created in the “migrations” folder, open this file and it should have something similar to what is in my example.
module.exports = function(_deployer) {
  // Use deployer to state migration tasks.
};
If you observe we can copy the same content that we have from the initial file that was created and change it only to the name of our contract, having a result below
const PHPiandoToken = artifacts.require("PHPiandoToken");

module.exports = function (deployer) {
  deployer.deploy(PHPiandoToken);
};
Well, with this change we can finally run the command that will compile and deploy our contract on our testnet.
truffle migrate
If everything went well, you will be able to see that our contract has been compiled and at the same time a unique address for our contract has already been created.
Starting migrations...
======================
> Network name:    'development'
> Network id:      5777
> Block gas limit: 6721975 (0x6691b7)


1651147758_p_h_piando_token.js
==============================

   Deploying 'PHPiandoToken'
   -------------------------
   > transaction hash:    0x0467d6952cb856c6d54dc6d76f8ab72f952bd4a81374627da18b0ee96ca02392
   > Blocks: 0            Seconds: 0
   > contract address:    0xa823dA942fA6173F35F708BE41429F61E0260ef6
   > block number:        29
   > block timestamp:     1651148187
   > account:             0x90d9f2D7BE04AE71d7a76a5B27ea9389f70186fb
   > balance:             99.65120344
   > gas used:            1830161 (0x1bed11)
   > gas price:           20 gwei
   > value sent:          0 ETH
   > total cost:          0.03660322 ETH


   > Saving migration to chain.
   > Saving artifacts
   -------------------------------------
   > Total cost:          0.03660322 ETH


Summary
=======
> Total deployments:   1
> Final cost:          0.03660322 ETH
Checking our token balance
There are a few ways we can see our token number in our wallet, 3 easy ways.
1st Using MetaMask, you can configure a new network using Ganache data, and then import the Ganache wallet.
2nd create a test file in Truffle and program a Javascript code for tests
3rd Or use the command truffle develop in the terminal console and execute some commands to check the balance.
More simple is MetaMask, to install you can following this tutorial
After installed MetaMask, let’s go configuring the Ganache network

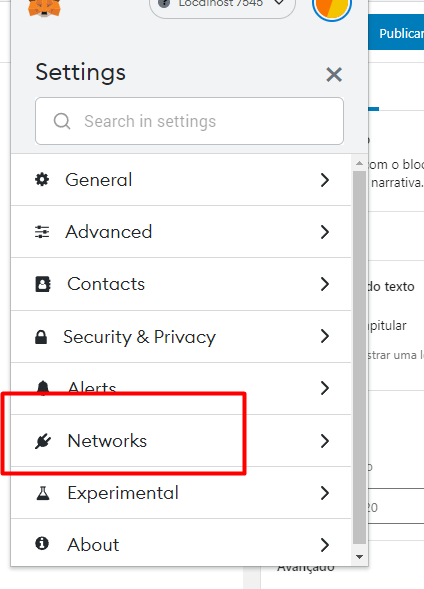
And click on add network
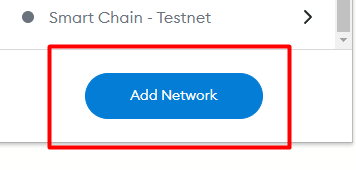

With this, configure a test network, if you look at your networks, Localhost 7545 should appear in the list

Now, let’s import our test wallet from ganache into Metamask, open Ganache and navigate to the wallet list and click on the selected place.

Copy the content “private key”
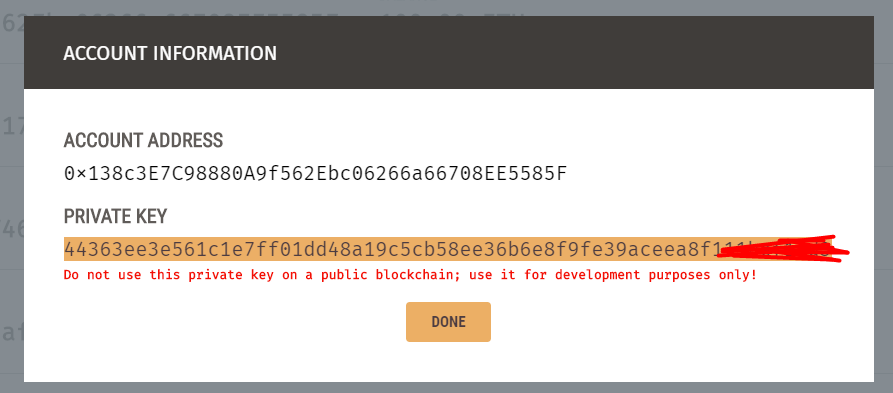
Go back to MetaMask and click on Import Account

Paste the content we copied earlier and confirm, with that a new account will appear in your metamask list.
My example result is:

Well, we’re almost done.
Now let’s put our token in the wallet…
Remember that truffle compiled and generated an address? If you go back a little bit, you’ll get a result.
 Deploying 'PHPiandoToken'
   -------------------------
   > transaction hash:    0x0467d6952cb856c6d54dc6d76f8ab72f952bd4a81374627da18b0ee96ca02392
   > Blocks: 0            Seconds: 0
   > contract address:    0xa823dA942fA6173F35F708BE41429F61E0260ef6
   > block number:        29
   > block timestamp:     1651148187

......
Let’s copy the contract address. Let’s go back in MetaMask and click add “Import Tokens”.
Just a note, you need to copy the address of the contract you generated in your truffle ok? if you copy the address that is in this article it will not work, because the test is being done on my machine and not on a public test network.
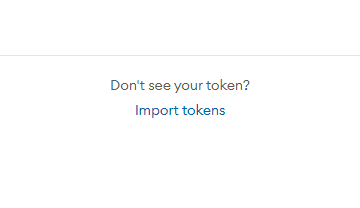
Paste the contract address in the first field and it will automatically be filled in with our token data.
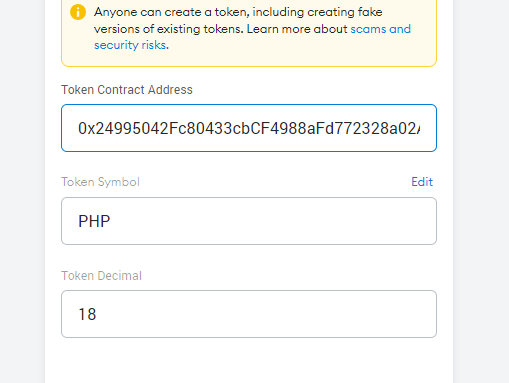
Ready!!!
You have your own token.
Obviously you won’t be able to share this token with other wallets, but imagining that in a second article I show you how to publish your token on a test network, you could share it with your friends.
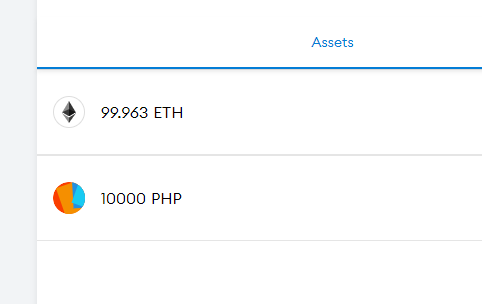
And with that you have your own ERC20 Token.